
I´d like to show you how I paint my Leman Russ tanks for my DKoK Army. Since they will be fighting in a witer urban environment I decided to use the old "white wash" camo that was used during WWII. It basicly is white paint over your normal tank color, applied by the soldiers during wintertime.
Let's get started with this step by step.
1. Give the tank a light basecoat with a black primer and then apply Vallejo german panzer grey primer with an airbrush

2. Next is the modulation of the tank, we want it be a bit lighter on the upper sides. So I use some colors of the AK interactive (only "AK" from now on) to achieve this with my airbrush.


3. Now I apply the company marking, which is a violet stripe.

4. Apply the decals you want. But first, put some gloss varnish on the area. After the decal is on apply 3-5 more layers of gloss varnish.

5. Next step is an invisible one. Spray the whole tank with AK Heavy Chipping medium and let it dry. Afterwards spray a thin white layer on the tank (with zenithal light in mind, so spray upper areas a bit more intense).

6. Now the weathering fun begins. Grab an old brush and some water and scrape the white paint randomly off the tank. On some areas you can increase the wear and tear and some other areas you might leave white. This gives a more realistic impression. After this step is finished, spray the whole tank with Satin Varnish. This is for protection of your work so far.

7. In the next couple of steps we use some more AK products. First up is the Filter blue for panzer grey, which is great for darklining all the rivets on the tank. You don't need to be overprecise right now, we will get rid of the excess filter in the next steps. So just let it flow in the recesses and again, have fun.


8. Paint rust streaks on the tank. Use a good brush with a fine tip for that. Vary the lenght of the streaks for a more realistic impression.

9. Now the magic is kicking in. We use white spirit (or odorless turpentine) to blend all the excess filter with the rest of the tank. Also blend the rust streaks while moving your brush up and down. Use just a little bit of white spirit for that, theres no need to flood the tank. After this step when the paint is dry, coat everything again with Satin Varnish.

10. The same as step 8 but only with Winter streaking grime and you can also add the streaking grime to some areas you want to modulate in color.

11. Blend with white spirit. Also I have added mud to the track and lower sections of the tank. the mud was generated by mixing Natron, AK Fresh Mud, AK Wet effects fluid and brown/grey pigments. This can then be applied where wanted and sealed with a coat of satin varnish. After the satin varnish more Wet effects can be added to make some areas appear like fresh mud.

12. Painting of the metallic parts like the Aquila on the turret. Just finishing work really. Tank driver painting etc... (Tank driver isnt painted in the example yet).

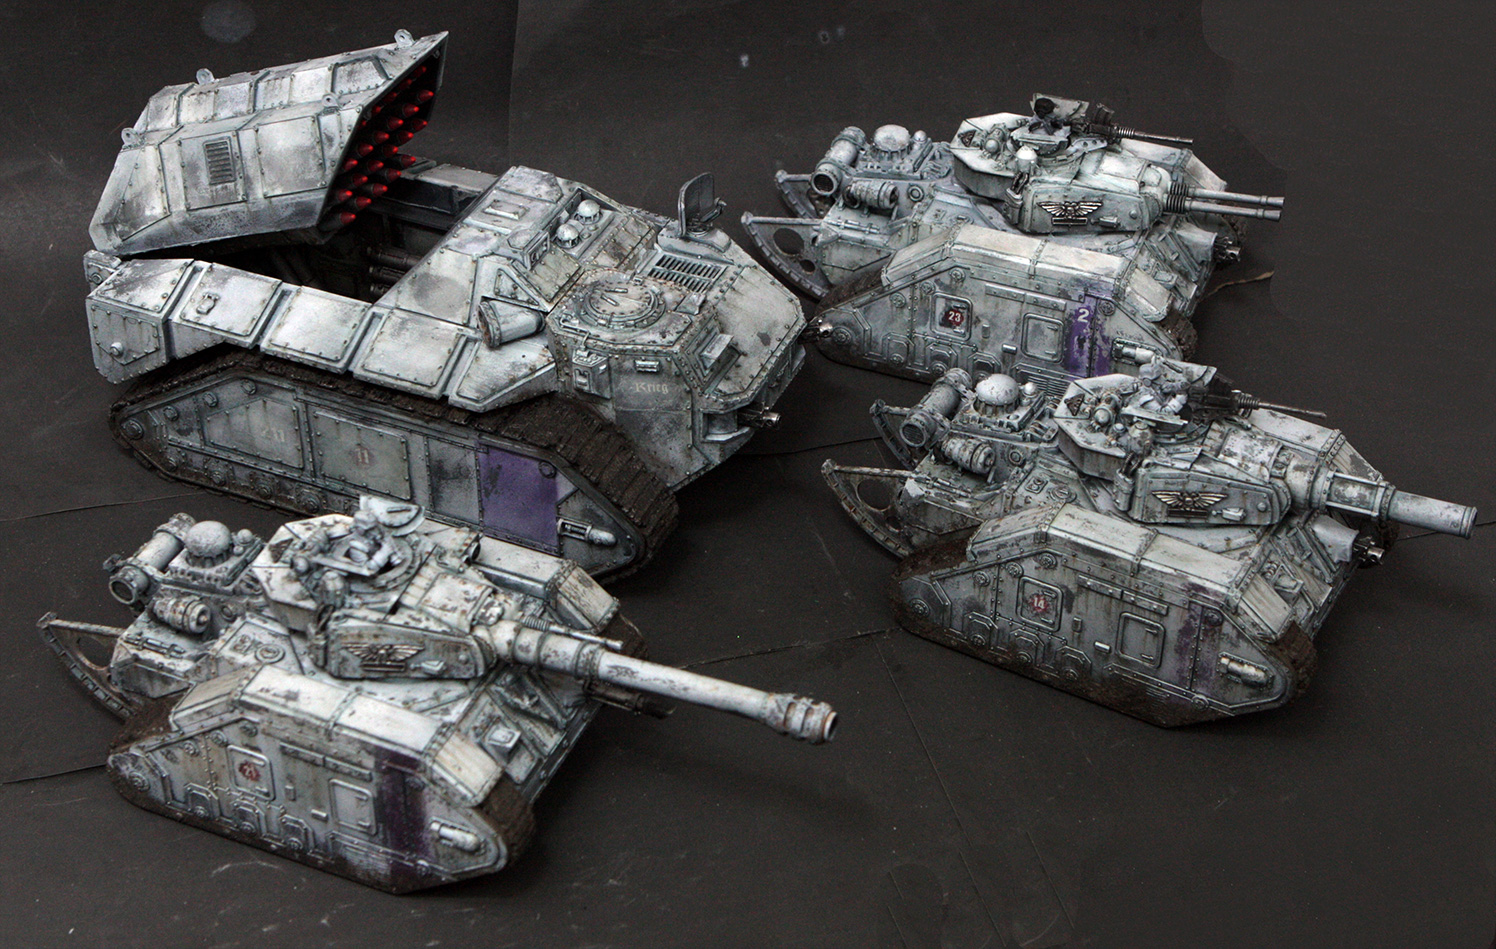
This is how a force painted with this technique can look like:
Hope you enjoyed the tutorial, if there are any questions please contact me in the comments. Also, for more in depth tutorials, visit the Blog of Mig Jimenez: http://migjimenez.blogspot.co.at/
kind regards,
Nathelis
- - - - - - - - - - - - - - - - - - - - - - - - - - - - - - - - - - - - - - - - - - - - - - -
Stay up2date! If you're not yet a follower of Miniature Fairy Tales you should subscribe and / or like our Facebook page.
Very nice. :)
ReplyDeleteNice Tut-- thanks for that.
ReplyDeleteGreat tutorial. Thanks for the tips and great photos. The armored column looks incredible!
ReplyDeleteIs there an alternative among paints from GW?
ReplyDelete