Showing posts with label p1per. Show all posts

Friday, September 13, 2013

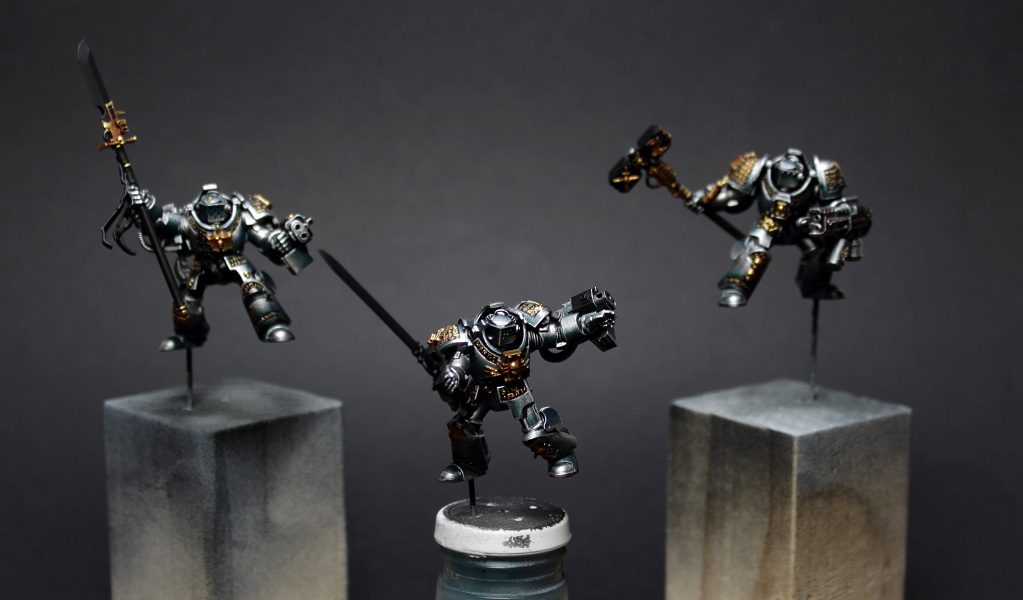
WIP: Grey Knights Terminator Squad (finished)

posted by p1per
Heya!

Here we go, finished Grey Knights Squad. Well, they are still "WIP" but my part of the commission is done (only TMM parts). All the other details will be painted by the customer.

Pictures are not that great but guess better than nothing (it's a pain in the a.. to take decent pictures of miniatures that only consist of metallic paint *arg*). ;)

Squad Front

Squad Back

Single Miniature Views

..and if you missed my other WIP post here's my color recipe for the painted TMM parts:

Silver-TMM:

Top Highlight: Vallejo Air Aluminium #71.062
1st Highlight: GW Mithril Silver

Basecoat: GW Boltgun Metal 

1st Shadow: Reaper Brilliant Blue #09116
2nd Shadow: P3 Coal Black
3rd Shadow: P3 Coal Black : GW Chaos Black ( 1 : 1 )

Shadows are glazed in multiple layers over the basecoat to get a smooth transition and to have matt non-reflective shadows.

Gold-TMM:

Highlights: Vallejo Game Color Polished Gold #72055

Basecoat: GW Shining Gold

Shadows: GW Scorched Brown

Same here for the shadows as with the silver - glazing multiple layers over the basecoat and getting more opaque towards the deepest shadows.


So long!

p1per

Friday, September 6, 2013

WIP: Grey Knights Terminator Squad

posted by p1per
Heya!

After finishing Sethin I started painting a Grey Knights Terminator squad which will be used for gaming, so keep that in mind when looking at the pictures. ;) Three are already finished and 2 more to go. You will realize that the details aren't painted yet so why am I saying they are finished? I will only be painting the armour / TrueMetallicMetal parts as part of a comission, details will be painted by the owner later on. :)

...and here are the pictures of the current 3 finished Terminators:

First one

Second one

Groupshot 1st and 2nd

Groupshot 1st, 2nd and 3rd

And as a little bonus if you like the metallics here's my color recipe:

Silver-TMM:

Top Highlight: Vallejo Air Aluminium #71.062
1st Highlight: GW Mithril Silver

Basecoat: GW Boltgun Metal 

1st Shadow: Reaper Brilliant Blue #09116
2nd Shadow: P3 Coal Black
3rd Shadow: P3 Coal Black : GW Chaos Black ( 1 : 1 )

Shadows are glazed in multiple layers over the basecoat to get a smooth transition and to have matt non-reflective shadows.

Gold-TMM:

Highlights: Vallejo Game Color Polished Gold #72055

Basecoat: GW Shining Gold

Shadows: GW Scorched Brown

Same here for the shadows as with the silver - glazing multiple layers over the basecoat and getting more opaque towards the deepest shadows.


That's it so far - see 'ya soon ;)

p1per


Thursday, August 22, 2013

Sethin finished

posted by p1per
Heya!

Finished a new miniature, Sethin from Rackham. In my opinion up until now one of the most beautiful miniatures ever sculpted, at least for me it's an all-time-favourite and finally I haven a painted version sitting in my display cabinet. :)


Hope you like her and if you want to vote:

Putty & Paint

CoolMiniOrNot


p1per

Sunday, July 21, 2013

Barbarian Dude - Finished

posted by p1per
Heya!

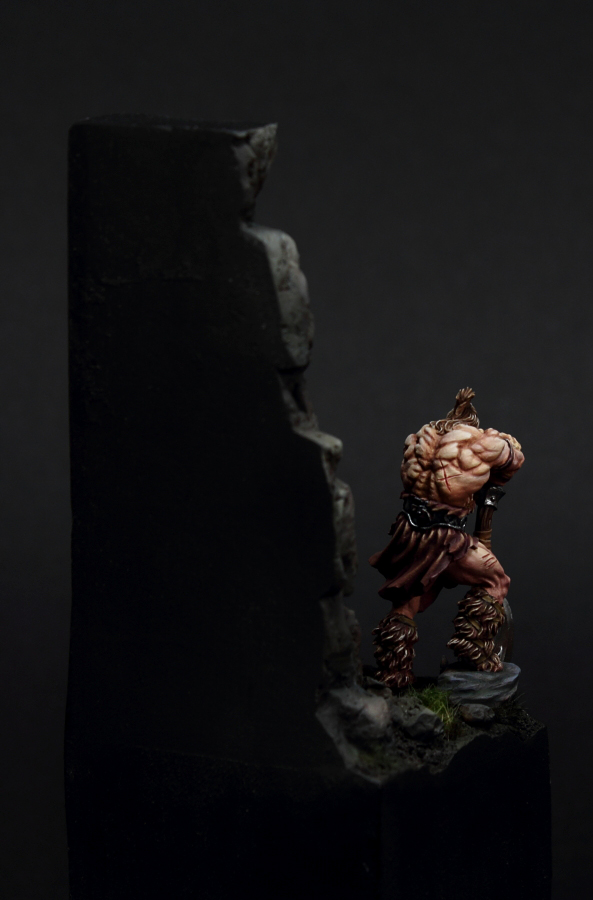
Barbarian Dude finally finished. :)


He has been way too long now on my workbench and as my motivation was slowly dropping it was about time to "finish" him and start something new. There are still certain things that could/should be improved but overall I'm quite happy how he turned out.


Some detail-pix:


... and voting links ;)

Putty & Paint

CoolMiniOrNot


Hope you like him :)


p1per

Sunday, May 26, 2013

Barbarian Dude: Miniature WIP 01

posted by p1per
Heya!

Started paintin' the miniature yesterday, not much done yet and consider everything still a work-in-progress but I'll show you a first look at his face. ;)


See 'ya soon ... now back painting :D

p1per

Saturday, May 25, 2013

Barbarian Dude: Base WIP-Log

posted by p1per
Heya!

Long time no see ;) I haven' posted in quite some time now but I will make up for it with an in-depth WIP-Log of the base I built for my next miniature which will be no other than the Barbarian Dude.

So let's get started:

First thing was to prepare the plinth cut off a piece and make some cuts here and there so the surface would look more natural. Next I glued some corkboard in the back which I will use as a filler for a mountain(-"wall") so I won' have to use so much putty. ;) Afterwards I covered the ground as well as the corkboard with milliput.


So the basis was done, now time for details. I added some minor adjustments to ground and sculpted the mountain.


Next one was easy ... glueing some soil to the ground. :D


Sanded the sides of the plinth and made some adjustments to the stones


Finally time to prime the whole thing - for this part I used a combination of black and white paint:


And last but not least ;) now with some paint on:


And that's it so far. Next steps will be to fill the pond (that cut-out piece) with some 2k water and start paintin' the Dude - FINALLY! :D


So long
p1per


Wednesday, April 24, 2013

Nocturna - Princess of Night

posted by p1per
Heya!

Here we go "finished" version of my Princess of Night. I did tweak some things but at the end I couldn't bring the motivation to push it further. Anyways hope you still like her. :)


And voting links:

CoolMiniOrNot

Putty & Paint

p1per

Monday, April 22, 2013

Nocturna - Princess of Night WIP 22-04

posted by p1per
Heya!

New WIP of my Princess of Night from Nocturna:


Not sure how much time I will spend on her... right now I'm not really having fun paintin' her and I don't why, I was actually really looking forward to it. :(

Hope you still like the current progress!

p1per

Monday, April 15, 2013

Scale75 - Dark Elf

posted by p1per
Heya!

Finally finished and in time for the contest. ;) 


Hope you like him.

p1per

Friday, April 12, 2013

Dark Elf - WIP Update 4

posted by p1per
Heya!

Almost there!

I'm not allowed to post final pictures before the images have been approved by the jury of the contest I want to enter him but I got one last b/w WIP for you. :) I still have to cleanup some areas and if I manage to do and get one in time I will add a "companion" to the base. ;)


p1per

Thursday, April 11, 2013

Dark Elf - Base WIP 3

posted by p1per
Heya!

Started working on the banner the other night. It's not finished yet, still need to smooth out some lines and I also want to add a pattern to the corners... once I figured out how the pattern should look *lol* ;)

Anyways here a picture:


p1per

Tuesday, April 9, 2013

Dark Elf Base - WIP 2

posted by p1per
Heya!

Just wanted to show a little progress on the base for my Dark Elf. It still needs more glazes for color variations as well as lights and shadows but here's how it looks right now.


p1per

Sunday, April 7, 2013

Dark Elf and Princess Update

posted by p1per
Heya!

As promised yesterday here's an update on my Dark Elfs base.

What happened: After adding some pva glue mixed with baking soda to create some grout almost all the definition and structure of the floor was gone. So it would have been a pain to paint and probably wouldn't look as good. Therefore I decided to re-do the whole base. :D

I didn't have another plinth in that particular size around so I had to modify the one I screwed up. First thing needed to was to get rid of the milliput. Not an easy task when it's already rock-hard. My choice fell on cutting off the upper part of the plinth and that's how it looked like after the operation:


My plan was to rebuild the plinth with plaster 'cause as you can see there wasn't much left of it. ;) In order to support the plaster and give it something to hold on to I drilled some holes in the plint and also glued some paper-clips in random places:


Now I cut out a form shaped like the plinth + wall from plasticcard and glued/fixed it onto the plinth. I thought I took some pictures of that step but it seems like I didn't or lost it - sry for that - but here's how the plinth looked after removing the plasticcards:


Fun part incoming... scratching alle the little stones in the plaster *yay*... not. After 1.5h the floor was done:


Moving onto the wall and stairs... another 2hours later I was finally done (I also added some damage and irregularities to the stones):


Last but not least (primed and basecoated):


...and now it's time to start painting it. ;)

One more thing - besides the base of my elf - I also did some rough sketching on the base of my Princess of Night:


p1per

Saturday, April 6, 2013

Nocturna - Princess of Night WIP01

posted by p1per
Heya!

Had some trouble with the base for my Dark Elf so I re-did pretty much the whole thing but more on that topic tomorrow. ;)

But to keep you up2date what's been going on besides my Dark Elf, here's a very early WIP of my next project, Princess of Night from Nocturna.


p1per

Sunday, March 31, 2013

Scale75 - Dark Elf WIP1

posted by p1per
Heya!

Currently I'm working on my Dark Elf from Scale75 which I plan to enter in a contest... deadline's in two weeks so not much time left. ;)


This hasn't all been done today. ;) I actually started painting him at the beginning of March

I still have a lot of things to do and/or fix but I wanted to paint... or lets say "sketch" everything as good as possible without it taking too much time and then move to the base.

No sooner said than done!

Worked on his base today.. well.. it didn't go as fast as I wished, I also had some trouble "glueing" the wall onto the plinth... hope it will stay where it is once the Milliput dries. Guess I will know tomorrow. :D But here some pics:


Plan for tomorrow is to do some finishing touches for the raw base, fix some spots like the transition between the wall / floor and start painting it. :)

p1per

Tutorial - TrueMetallicMetal (TMM)

posted by p1per
Since I had to do the backside of my Troll's axe at the end I thought I might give it a try and take some step-by-step pictures of my painting. Unfortunately some pictures turned out quite blurry but I hope that the progress is still recognizable during the different steps.

Dilution:

Basecoat: 1 : 1 Paint : Water
Everything else: 1 : 2 Paint : Water (unless otherwise stated)

Let's go!

1. Silver-TMM

Basecoat was done with Coat'd'Arms Gunmetal(this one's an equivalent to GW Boltgun Metal).

Shadows:

For the first shadow I picked a green color P3 Ordic Oliveand started glazing it towards the shadows starting about in the middle of each part. I will be reworking the midtones later on so don't worry about starting the shadows in the middle.


Ok, this one looks weird but it will come out nicely at the end. :D

Next I used a mix of P3 Cygnar Blue Base : P3 Exile Blue ( 1 : 1 ) . Again, glazing towards the shadows and leaving a bit of the green untouched. I also try to make the paint more opaque in the deeper shadow areas.


To intensify the shadows, my next mix consists of P3 Exile Blue : P3 Beaten Purple ( 1 : 1 )and like before leaving a bit of the previous layer untouched I start glazing towards the deeper shadows.


Ok, enough of those funky colors. :D It's time to move towards black for the deepest shadow. For the next shadow I used P3 Exile Blue : P3 Beaten Purple : P3 Coal Black ( 1 : 1 : 1 )and concentrating more and more on the deepest shadows.

Note:The name P3 Coal Black is a bit irritating since it's not really a black, not at all. It's more like Vallejo Model Colour's Dark Sea Blue maybe even a bit brighter.


For the last shadow I added some GW Chaos Black to the previous mix P3 Exile Blue : P3 Beaten Purple : P3 Coal Black : GW Chaos Black (1 : 1 : 1 : 1) and glazed it on the very end where the deepest shadow would lie.


Highlights:

First thing I do before I start with the actual highlights is bringing back some of those metallic pigments as well as the midtone. For this I use the basecoat color Coat'd'Arms Gunmetaldiluted with a ratio of about 1 : 4 with water. I glaze 1(-2) thin(!) coats over the entire area (yes also shadows!) and then, with the same diluted paint, start to bring back the midtones and soften transitions.


Slowly taking shape… :D

Now highlights. For the first highlight I use a mix of Coat'd'Arms Gunmetal : Coat'd'Arms Enchanted Silver (this one's an equivalent to GW Mithril Silver) (1 : 2). Like with the shadows I glaze it upwards moving my brush towards the highlight areas.


Followed by pure Coat'd'Arms Enchanted Silverleaving some of the previous layer untouched.


To increase the shine and contrast for the top highlight I used a mix of Coat'd'Arms Enchanted Silver : VMC Metal Medium (1 : 1-2) and glazed it in as a final "bright spot" / highlight.


Not done yet – still missing edge highlights and scratches. :)

For the edges I actually use pure VMC Metal Medium but it's quite exhausting to paint it pure over dark layers of paint to really get the full effect and bright edges. Therefore I "pre-prime" the edges with the following mix P3 Morrow White : VMC Metal Medium (1 : 1-2). Due to the white paint and already some metallic pigment in it, it will be much easier to apply the VMC Metal Medium in the next step (and actually see it shine).


As you can see although I mixed some VMC Metal Medium to my white paint those edges aren't really shiny (yet) but I will deal with it now. Using only VMC Metal Mediumand going over all the edges I previously "pre-primed".


Here we go shiny edges. Now onto the scratches. Like with the edges I first pre-painted the highlights with P3 Morrow White : VMC Metal Medium (1 : 1-2)and then going over all lines again with pure VMC Metal Medium. I started with the white highlights and not with the black actual scratches because this way it is often easier for me to make the white lines real thin by painting over it later with my black color.


And finally the scratches with pure GW Chaos Black(undiluted!).


That's it for the Silver TMM part – now the Golds.

I also reglazed the deepest (last) shadow in between to cover some of those metallic pigments that were shining through from glazing Gunmetal over the entire area.

2. Gold-TMM

It's more or less the same for the Gold as it was for the Silver so I will keep the descriptions rather short.

Basecoat was done with GW Shining Gold.

Shadows:

I applied the first shadow using GW Snakebite Leatherand again starting about in the middle and pulling my brush towards the shadows.


Next I applied some GW Snakebite Leather : GW Scorched Brown (2 : 1)leaving a bit of the previous layer untouched.

Unfortunately it's quite difficult to see the difference in the next steps until the last two shadows are applied. Anyway technique's the same always leaving a bit of the previous layer untouched and moving the brush towards the shadows.


Continued work on the shadows with GW Snakebite Leather : GW Scorched Brown (1 : 1)


Pure GW Scorched Brown


For the last shadow I added some black and applied it to the deepest shadow parts, GW Chaos Black : GW Scorched Brown (1 : 2)


Highlights:

First thing I did was bringing back some metallic pigments as well as the midtones and softening of the transitions (like described in the silver part). Glazed 1(-2) times over the whole area with some diluted GW Shining Gold(diluted 1 : 4 with water) and then worked on bringin back the midtone and softening transitions.


Followed by adding highlights moving my brush towards the light / brightest spots with

- GW Shining Gold : GW Auric Armour Gold (1 : 1) - GW Auric Armour Gold


The last highlight was done with a mix of GW Auric Armour Gold : VMC Metal Medium (1 : 1)concentrating on the brightest spots.

Edges were done the exact same way like in the silver part. Pre-priming with P3 Morrow White : VMC Metal Medium (1 : 1-2)and then going over with pure VMC Metal Medium.


Colors Overview:

TMM - Silver:

Basecoat:Coat'd'Arms Gunmetal

Shadows:
1.) P3 Ordic Olive
2.) P3 Cygnar Blue Base : Exile Blue (1 : 1)
3.) P3 Exile Blue : P3 Beaten Purple (1 : 1)
4.) P3 Exile Blue : P3 Beaten Purple : P3 Coal Black (1 : 1 : 1)
5.) P3 Exile Blue : P3 Beaten Purple : P3 Coal Black : GW Chaos Black (1 : 1 : 1 : 1)

Highlights:
1.) Coat'd'Arms Gunmetal : Coat'd'Arms Enchanted Silver (1 : 2)
2.) Coat'd'Arms Enchanted Silver (Mithril Silver)
3.) Coat'd'Arms Enchanted Silver (Mithril Silver) : VMC Metal Medium (1 : 1-2)

TMM - Gold:

Basecoat:GW Shining Gold

Shadows:
1.) GW Snakebite Leather
2.) GW Snakebite Leather : GW Scorched Brown (2 : 1)
3.) GW Snakebite Leather : GW Scorched Brown (1 : 1)
4.) GW Scorched Brown
5.) GW Chaos Black : GW Scorched Brown (1 : 2)

Highlights:
1.) GW Shining Gold
2.) GW Shining Gold : GW Auric Armour Gold (1 : 1)
3.) GW Auric Armour Gold
4.) GW Auric Armour Gold : VMC Metal Medium (1 : 1)

Edges (Silver & Gold):
1.) P3 Morrow White : VMC Metal Medium (1 : 2)
2.) VMC Metal Medium


That's it. :)

Hope you enjoyed this little Step-by-step.

Cheers
p1per