Hi folks,
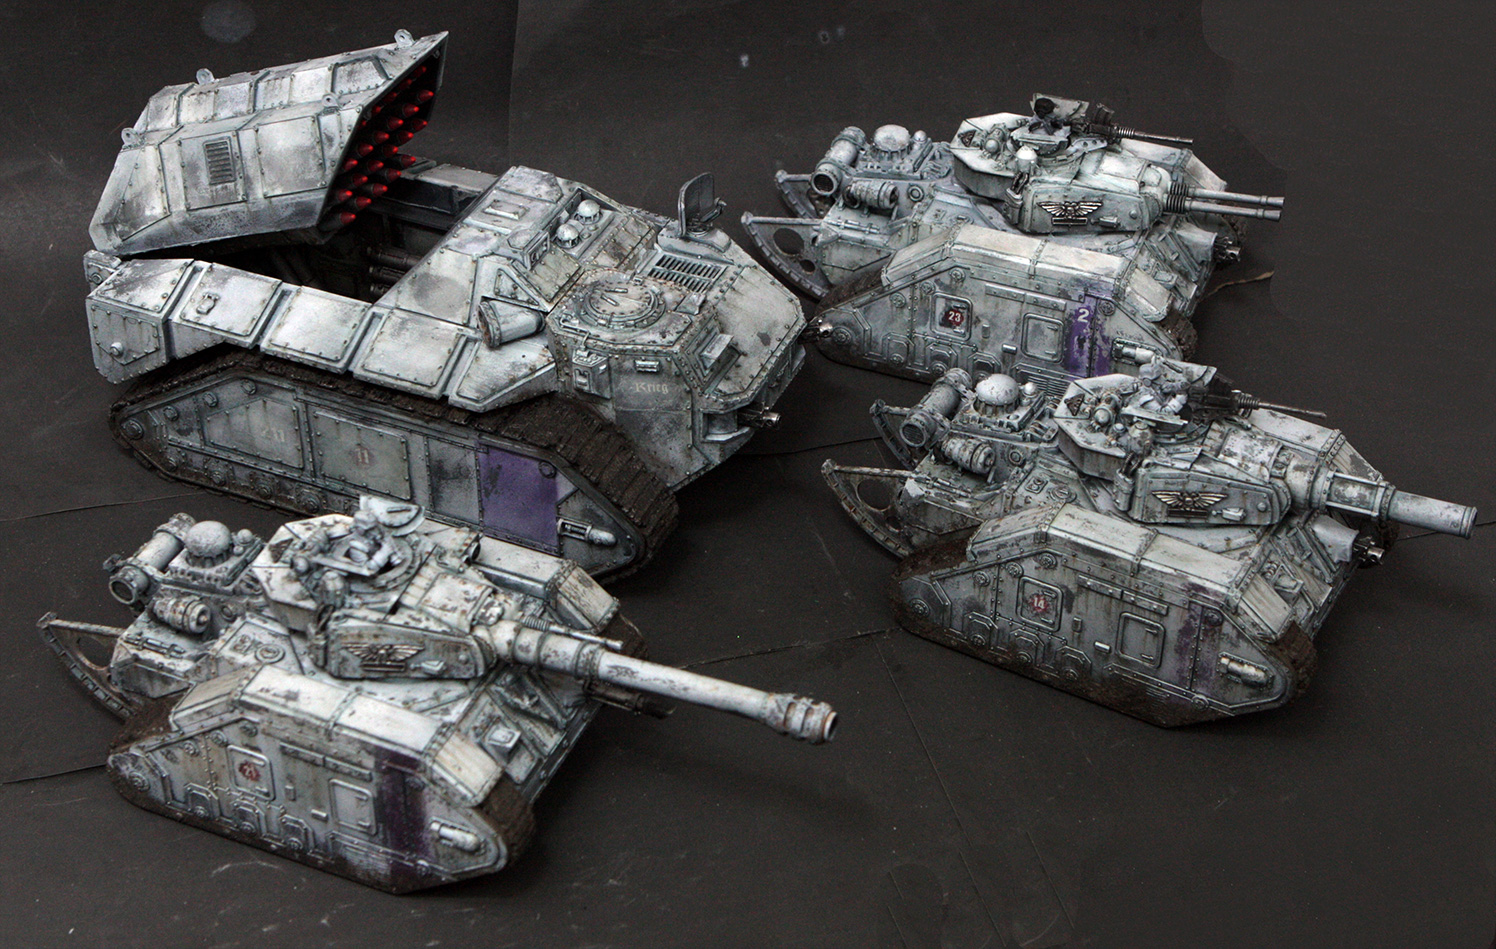
this time I´m back with a paint scheme tutorial for my new Death Korps of Krieg Army. So this is a small step by step and color recipe article.
I want the Army to look at home at a cold Winter urban fields, or maybe at ash wastes urban field. The colors were chosen with that in mind.
1. Building the miniature and basing it with Vallejo sandy paste, concrete rubble mix, and a little pieces of barbed wire. Priming was done with airbrush and first black, then zenithal white (2K priming).
2. Blending of the trenchcoat. I went for grey-blue winter colors. You'll notice that on the backside the coat is highlighted zenithal downwards, this is done against realism but for a nicer view on the tabletop.
Color recipe for the blending:
VMC Black
VMC Dark Bluegrey
VMC Dark Sea Blue
P3 Trollblood Base
VMC Blue Grey Pale
VMC Pale Blue
VMC White
3. Paint the gasmask, as this is the central theme of the Krieg army I painted it different than the rest of the Model. In very light colors. Note that there is texture on it and it's highlighted around the seams.
Color recipe:
VMC Cork Brown
VMC Iraqui Sand
VMC Deck Tan
VMC White
4. Paint boots and leggins/gloves. For the boots I wanted a worn leathery look. This is achieved by painting sharp highlight dots on the edges. The leggins are simply highlighted in various steps. Always remember where the light hits them from the most commong angle and highlight that part stronger.
Color recipe (boots):
VMC Black/VMC Flat Brown 50/50
VMC Flat Brown
VMC Cork Brown
VMC Iraqui Sand
Color recipe (leggins):
VMC Black/Cork Brown 50/50
VMC Cork Brown
VMC Iraqui Sand
VMC Deck Tan
5. Paint helmet and carapace armour. I wanted them to look black and dark, so while I used my usual silver NMM colors, most of the surface had to remain black with very light highlights, that are blended in a very short space to black. If you make too much of the space a highlight area, it will look grey and not black.
Color Recipe (Black):
VMC Black
VMC Dark Sea Blue
VMC White
6. Paint the violet parts. I choose a cold violet as my company colors. This bonds the army together and differentiates them from other Krieg companies (If i were ever to paint a second company...). Remember, you can desaturate colors by adding a grey of the same lightness level to it. So if the violet you have is too bright and colorful, add a bit of black/grey or white to it.
Color recipe:
VMC Black
VMC Purple
VMC White
7. Paint metallics and grey respirator. Metallics were done in TMM style with
Black, GW Chainmail and
VMC Metal Medium. First one can mix
Black with
Chainmail, to get a Dark basecoat of the areas. Then highlight with pure
Chainmail and then put dot highlights with
Metal Medium where the reflections should be.
The grey parts of the respirator and cable was done in 3 highlightning steps from Black basecoat.
VMC Black/London Grey 30/70
VMC London Grey
VMC White
8. Paint additional parts, pistol holder, knife, Vox cable and Vox
Pistol holder and Knife were blended with the recipe from Step 7. The vox cable was black and P3 Coal Black in different layers of transparency. The Vox itself is painted black and highlighted on the edges with
Chainmail and
Metal Medium.
9. basing and finishing the miniature
First I applied a layer of
AK Fresh Mud to the base, and while this is still wet, put various grey pigments on that. Pk-Pro crushed glass was added for the snowy/ash effect and everything fixed with AK Gravel&Sand Fixer.
keep on happy painting,
Nathelis